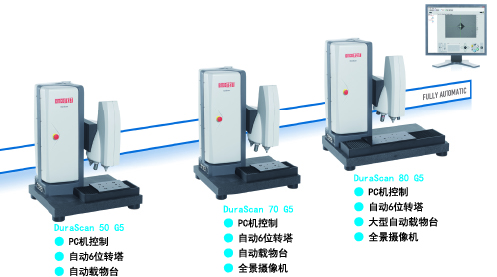
The characteristics of DuraScan G5:
● Versatile: The unique test load range (0.25 GF to 62.5 KGF) means you can use the DuraScan G5 for different applications, while using other devices requires the use of micro and macro indentation hardness meters respectively
● Repeatability: Automatic control and load sensor technology ensure that the DuraScan G5 not only meets all standards, but also provides the greatest possible accuracy and repeatability over the entire load range
● Auto focus, full automatic throughout the test cycle, including loading, indentation, unloading, focusing and valuation. Automatic loading platform can automatically run the entire test series
● Easy to operate: The ECOS workflow software follows the natural steps of hardness testing, making the machine easier to operate
● Depth measurement and weld Detection: The DuraScan G5 is second to none in automatic depth measurement of hardness (CHD) and weld detection. DuraScan G5 provides depth and weld hardness measurements faster and more reliably than other durometers.
● Test point editing, define hardness limit after follow-up measurement (for CHD), greatly shorten the measurement time, automatic indentation spacing setting and hardness depth measurement image projection

Hardness test workflow

Depth measurement and weld inspection

The characteristics of DuraScan 50/70/80 G5 :
Advanced automation and intuitive software make high-volume testing and complex testing modes faster and easier.
● Laboratory hardness tester with large load range
● 0.098 -- 612.9N (optional load 0.002452 -- 612.9N)
● Automatic loading platform (improve accuracy and repeatability in measurement)
● 6-position automatic turret (improve automation and reduce calibration)
● Electric loading platform
● Panoramic camera (DuraScan 70 G5, 80 G5)
● 10 megapixel camera
● Advanced autofocus technology and high quality optics provide perfect autofocus, even on non-reflective surfaces such as etched and welded surfaces
● Optional ring lamp