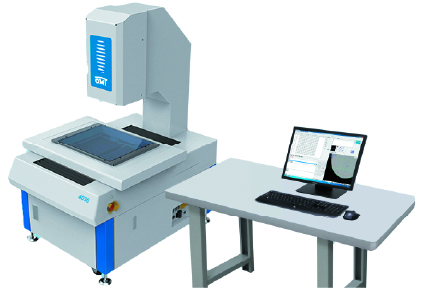
Main features:
● adopt precision granite machine with high precision and good stability;
● precision cross roller guide rail of X and Y platforms to ensure accuracy and service life
● CCD photoelectric conversion, easy to adjust the light source intensity and remember the light intensity
● CNC servo motor double closed loop control is adopted for X, y and Z axes
● three direction coordinate axis is equipped with photoelectric displacement sensor with resolution of 0.05um
● the control box is equipped with fine adjustment setting and magnification adjustment buttons
● high pixel telecentric optical lens
● equipped with automatic zoom optical lens, with high precision and good stability;
● high resolution CCD to realize high-definition measurement of products;
● adopt high-definition digital camera and z-axis auto focus
● modular design, convenient assembly and maintenance
● one key measurement, multiple workpiece images can be measured simultaneously within the field of view
● laser point vision assisted fast locking of the measurement area;
● it can be equipped with laser scanning module and contact measurement module
● automatic control of full mouse, simple and easy to use;
● provide various specifications and configurations, which can be customized according to requirements
● intuitive operation interface, customizable test report and intelligent automatic feature recognition

| model | OMT 3020 Precision type | OMT4030 Precision type | OMT 3020 Standard type | OMT4030 Standard type |
| Marble worktable mm | 487x367 | 606x476 | 487x367 | 606x476 |
| Table glass mm | 345x245 | 445x345 | 345x245 | 445x345 |
| Working stroke mm | 300*200*200 | 400*300*200 | 300*200*200 | 400*300*200 |
| XYRepetition accuracy μm | ≤1 | ≤2.0 |
| E1x ,E1yaccuracy μm | 1.5+L/200 | 2.0+5L/1000 |
| E2xyaccuracy μm | 1.8+L/200 | 2.8+5L/1000 |
| Grating ruler resolution μm | 0.2 | 0.5 |
| Table bearing kg | 15 | 30 |
| speed | XY轴200mm/s Z轴100mm/s |
| optical system | 6.5:1 variable times |
| CCD | High resolution industrial color CCD camera |
| Contour light source | LED cold light source, 256 level brightness adjustable |
| Surface light source | 6-ring 8-zone LED cold light source, each section is operated independently, and 256 level brightness is adjustable |
| Measurement software | D-Vision |
| work environment | Temperature 20 ℃± 2 ℃, temperature change < 1 ℃ / HR, humidity ≤ 80% |
| Power Supply | 220V / 50Hz / 10 equipment shall be grounded, and the grounding resistance shall be less than 4 ohms |
Remarks: 1. L refers to the measurement length in mm. 2. The magnification is an approximate value. The specific value is related to the size and resolution of the display.