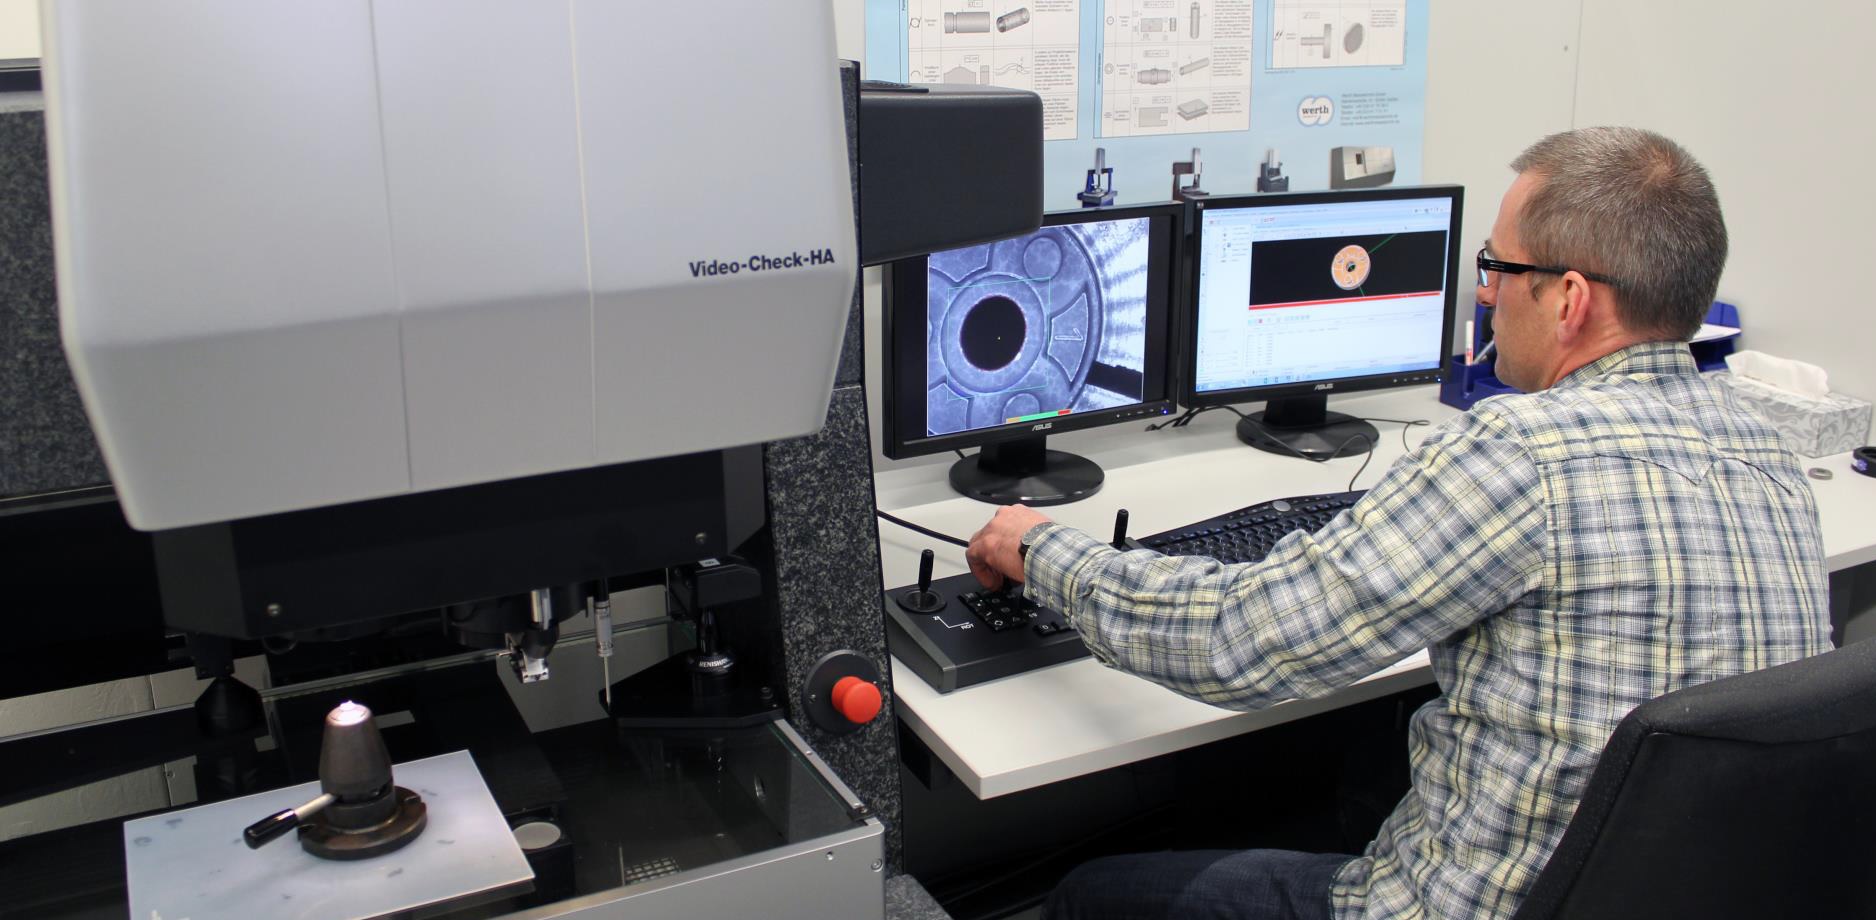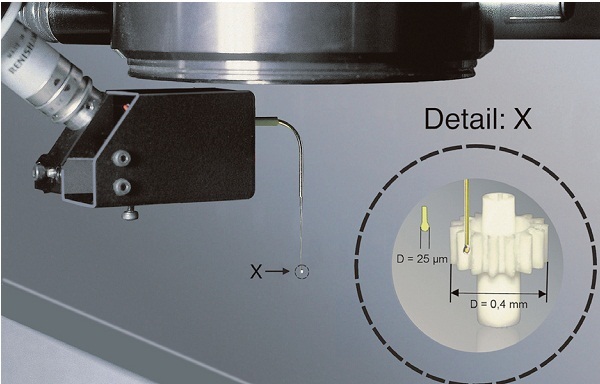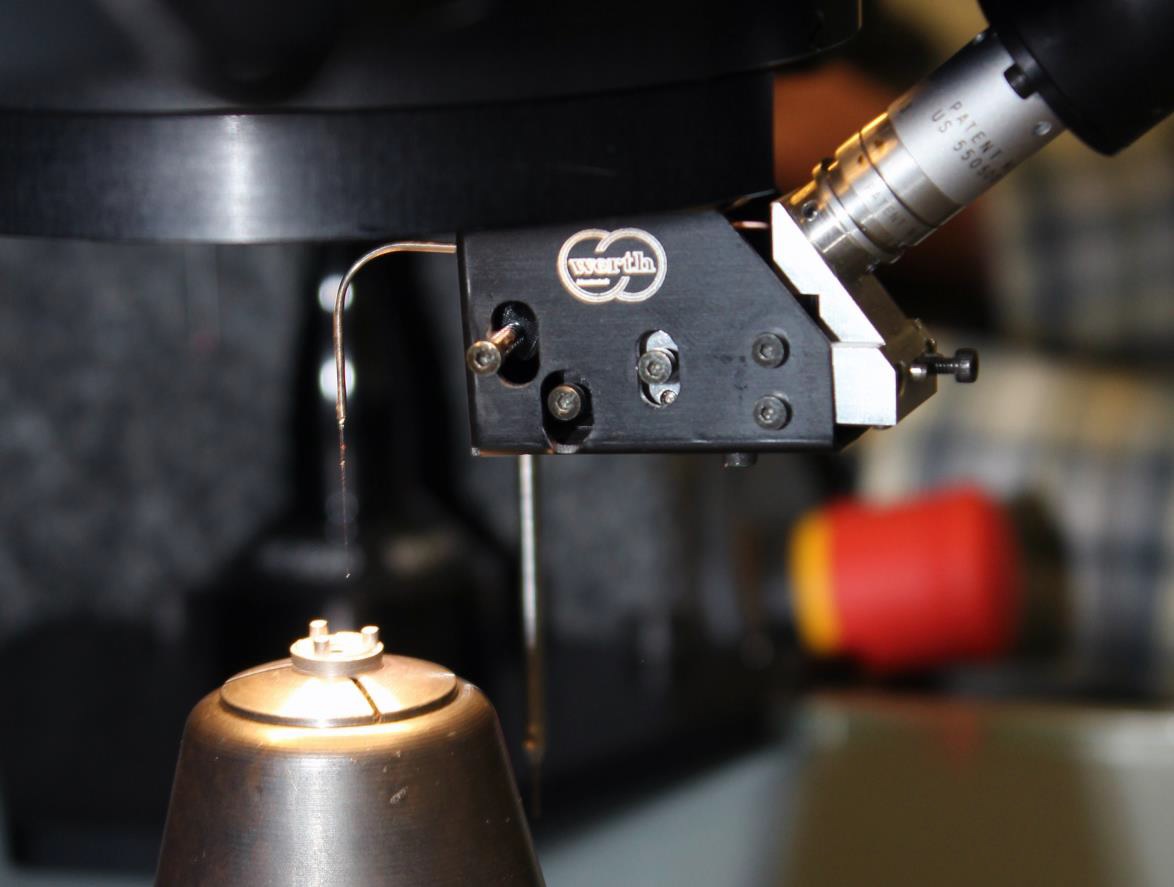
How does German black technology solve the problem of small module gear measurement, and how to ensure the quality of micro planetary gears in micro system? A multi-sensor CMM, an optical fiber probe and a set of software make it possible - using scanning operation, the tooth profile surface can be measured quickly and accurately according to strict standards. Extreme temperature, vibration and collision from - 100 ℃ to + 200 ℃ - maxon motor from Saxon, Switzerland has reliably completed its operation under severe conditions. This makes them an excellent choice for unusual and challenging industries and applications, such as space exploration: for example, NASA's Mars rover Spirit and opportunity are equipped with 39 Maxon motors respectively. For more than ten years, they have been working steadily under difficult conditions on the red planet. The driving components become smaller and more precise. On earth, maxondc motors operate at up to 90% mechanical efficiency. They are used in antennas, radio poles, ships and aircraft to provide smooth communication. They are applied to the shock absorber to improve the driving guarantee; Application in industrial production, increase production automation; It is used in surgery to help correct vision problems and even provide accurate insulin doses for diabetic patients. The trend of miniaturization is reflected in all walks of life. This means that the motor components must be smaller and smaller. Maxon motor has released a series of modules in the name of micro driver, including motor, gearbox, sensor, control electronic components, etc. these modules can be combined into a micro drive unit with a diameter of only 6mm. Even these miniaturized units and their micro components still need to pursue high quality requirements - this is the tradition of Maxon. In 1988, Maxon obtained ISO9001 certification. Today, motor manufacturers also implement various other quality standards, including EN9100 standard for developers and manufacturers in the aerospace industry. Maxon's medical business group has passed the ISO13485 medical standard certification, which proves that all processes and steps are recorded and traceable. Challenge: Roland rossacher, 0.12 module gear, director of technology R & D department, has been responsible for the quality assurance of automatic control motor for more than 20 years. 'Our certification means that we have an obligation to test even small driving parts. Measuring plastic 0.12 modulus injection molded gears (used in 6mm diameter GP6 planetary gearbox) is a difficult challenge,' he said A few years ago, the director of the quality management department and his team had to find suitable measuring equipment and means to test the design requirements of micro toothed parts in detail. Adrian Burch, head of quality assurance in the assembly testing department, focuses on this goal. Skilled high-end technicians summarized these requirements: 'we need measurement reports so that our molds can formulate effective corrections and produce a series of high-precision injection molds with only a few possible correction cycles. The measurement must also be suitable for the first inspection of micro gears and the test of a large number of samples.' The molding, production and measurement of micro gears are the core competitiveness of automatic control motors. It is located at the factory headquarters in sachseln, Switzerland. The micro EDM machine in the production area uses 0.02 to 0.2mm diameter wires to inject the mold onto the required tooth surface. In the micro injection mold production line, up to 8 cavity molds produce plastic gears. Typical methods fail to measure micro plastic gears. Earlier, maxonmotor mainly used standard double-sided meshing gear rolling detection in gear tooth measurement. This is a traditional detection method for spur and planetary gears, which is detailed in VDI / vde2608 standard. Each tooth style requires a special main gear. The main gear and the test gear contact with a small pressure, and then mesh and rotate. The two gears mesh and rotate for one cycle without clearance. Then the change of center distance and motion consistency are measured and analyzed by software. However, for the small plastic gear with modulus of 0.12, the rolling detection method of double-sided meshing gear is problematic. Because even a little pressure will deform small teeth, resulting in wrong results. Adrian Burch believes that it is obvious that the traditional contact measurement methods such as contact trigger probe and scanning probe can not solve the above problems. 'Here, we still need to generate contact force during measurement to generate the detection signal of the probe. At the same time, the diameter of this kind of probe ball is still too large for the measurement of small tooth surface to go deep into the tooth root circle.' Fundamentally, only the optical method is suitable for this measurement task, but the optical sensor can not approach the tooth surface of the micro gear. How does German black technology solve the problem of small module gear measurement? There are such tiny planetary gears in GP6 planetary gearbox. Measuring them is a challenge: pinion with modulus of 0.12, top diameter of 1.908mm, root diameter of 1.347mm, 13 teeth, material of delrin100. Photo source: maxonmotor solution: contact optical measurement using optical fiber probe Mr. Burch's quality team at Weide Measurement Technology Co., Ltd Werthmestechnik has found a reliable solution suitable for measuring micro gears. Weide company, located in Giessen, Germany, is a leader in the field of coordinate measurement technology. It has a variety of advanced technologies such as optical sensors, composite sensor system, X-ray tomography technology and, of course, the technology for measuring micro features. It was decided by maxonmotor's quality team With high-precision werthvideocheck ® HA Compound CMM. The reason for choosing this machine is that under laboratory conditions, using image processing sensors can achieve two-way, and the allowable error is only (0.5 + L / 900) μ m。 They chose 10x telecentric lens, trigger probe tp200, Weide optical zoom lens, Weide optical fiber probe (WFP) and winwerth ® Gear measurement software package. 'The main reason why we made this decision was the Weide optical fiber probe,' Roland rossacher explained. 'We can even use it to measure the tooth surface of micro gear, including in scanning mode.' How does German black technology solve the problem of small module gear measurement? WFP consists of a glass fiber with a top diameter of 20 μ M probe ball. Compared with the traditional contact measurement method, the function basis of optical fiber probe is contact optical measurement. The probe rod is no longer used to transmit mechanical signals to the probe head, but only to locate the tiny probe ball. The position of the probe ball is captured optically by the image processor through the telecentric lens. This enables the use of micro probes with corresponding high accuracy (contact deviation ≤ 0.3 μ m) It is possible to measure geometric features. Like the traditional probe, the software calculates the corresponding measurement points through the probe ball radius. Because the probe rod is thin, the contact force is almost negligible, even for small probe balls. Therefore, even plastic gears will not deform. How does German black technology solve the problem of small module gear measurement? WFP optical fiber probe is a micro probe in high-precision applications. It makes it possible to measure extremely small geometry with minimal force and high precision. Another advantage of the contour ratio for die correction is that there is no need for complex fixtures, because the external force on the workpiece is almost zero. Ralf nutto, a survey engineer, has been responsible for using werthvideocheck ® Ha has been measured for two years. 'We just need to fix the pinion on the base of the measuring table with a piece of tape, and then use an optical sensor to capture the outline of the gear teeth,' he explained WinWerth ® The measurement software package uses two-dimensional data to calculate the path to be passed by the optical fiber probe during scanning, because the optical fiber probe can also scan unknown contours. When the specified path is not strictly required, scanning along the preset path will be faster. Since the height of the gear is about 1mm, when scanning the tooth profile, the measurement engineer sets the depth of the optical fiber probe to -0.5mm in the area contacting the gear. This area cannot be reached by other methods. Finally, the radial runout of these gears can also be measured by measuring the shaft seat diameter using the same method. Scan above 1 μ The precision of M provides a high point density for the contour. The actual contour can be visualized in 3D-CAD comparison and become a color coding deviation map based on CAD data set. This analysis is of great significance to the mold workshop because it can accurately correct the mold at the deviation position in case of deviation. Simple steps, accurate data, gear measurement program can be integrated in winwerth ® In the software package. After inputting the specified measurement data, the measurement sequence, including the measurement path, will be automatically generated and executed. The software calculates typical tooth profile deviations, such as involute and tooth surface deviation, single and cumulative inclination, surface tomography, tooth thickness deviation and radial runout. Adrian Burch, QA supervisor of assembly inspection, was also satisfied with the measurement time. 'The measurement time of each sample is about 10min, but the one-time programming for each type of gear takes a little longer. After the programming, we will analyze the data offline.' For him and Roland rossacher, head of Technology Development Department, it is undoubtedly worth promoting the special technology including measuring gears with optical fiber in maxonmotor. Due to the improvement of first article inspection and process evaluation, the correction cycle of mold workshop can be shortened, and the inspection cost for series products can be greatly reduced. Roland rossacher is very satisfied with this: 'we have thousands of such gears in use, and measurement is indispensable'. How does German black technology solve the problem of small module gear measurement? Roland rossacher (left), director of maxonmotor technology development department, Adrian Burch, director of assembly inspection QA department (right) evaluates the measurement data with the printed color coding deviation diagram.
The driving elements become smaller and more precise
Challenge: 0.12 module gear
The typical method failed to measure the micro plastic gear

There are such tiny planetary gears in the GP6 planetary transmission. Measuring them is a challenge: modulus
0.12 pinion, with tooth top diameter of 1.908 mm, tooth root diameter of 1.347 mm, 13 teeth, material
The material is Delrin 100. Image source: maxon motor)
Solution: use optical fiber probe for contact optical measurement


How does German black technology solve the problem of small module gear measurement
Simple steps and accurate data

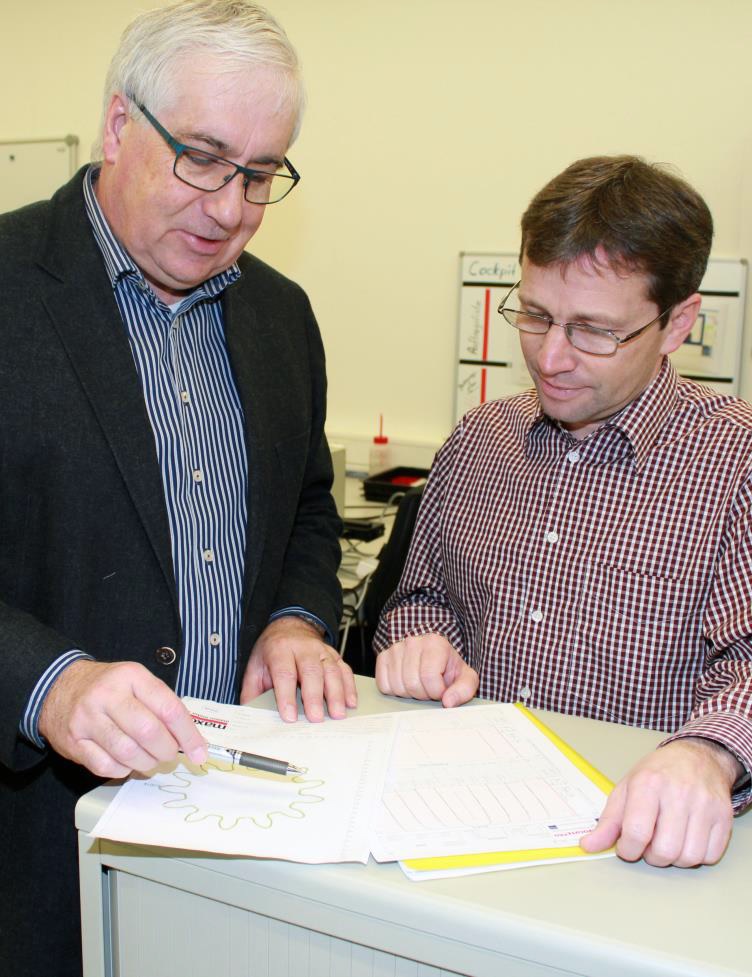
Roland rossacher (left), head of maxon motor technology development department, Adrian Burch, head of assembly inspection QA department (right), evaluates the measurement data with the printed color coded deviation diagram.